
DIY SeaDek: Tips for Perfect Cuts
posted by Erica Fisk on Jul 24th 2026
Cutting SeaDek looks deceptively simple. It’s foam, after all - how hard could it be? And yet, most DIY SeaDek installs that go wrong don’t fail because of poor adhesion or bad material. They fail at the cutting stage, where rushed passes, dull blades, or uneven pressure turn what should be clean, factory-style edges into something far less satisfying.
If you’re planning to cut and install SeaDek yourself, precision matters more than enthusiasm. The difference between a professional-looking result and a patchy one usually comes down to a handful of small decisions made early on: how you prep, how you template, and how you guide the blade. Get those right, and cutting SeaDek by hand is entirely achievable. Get them wrong, and no amount of careful sticking will hide it later.
In this guide, we will explain how to cut SeaDek in a way that produces clean edges and a proper fit, so the finished deck looks intentional once everything is installed.
Quick Answer: Best Way to Cut SeaDek
The best way to cut SeaDek is with a fresh snap-off utility knife and a metal straightedge, using multiple light passes instead of forcing a deep cut.
Always cut on a firm surface, dry-fit every piece before removing the backing, and save bevels for cases where you actually want the look - square edges are usually cleaner and more forgiving.
|
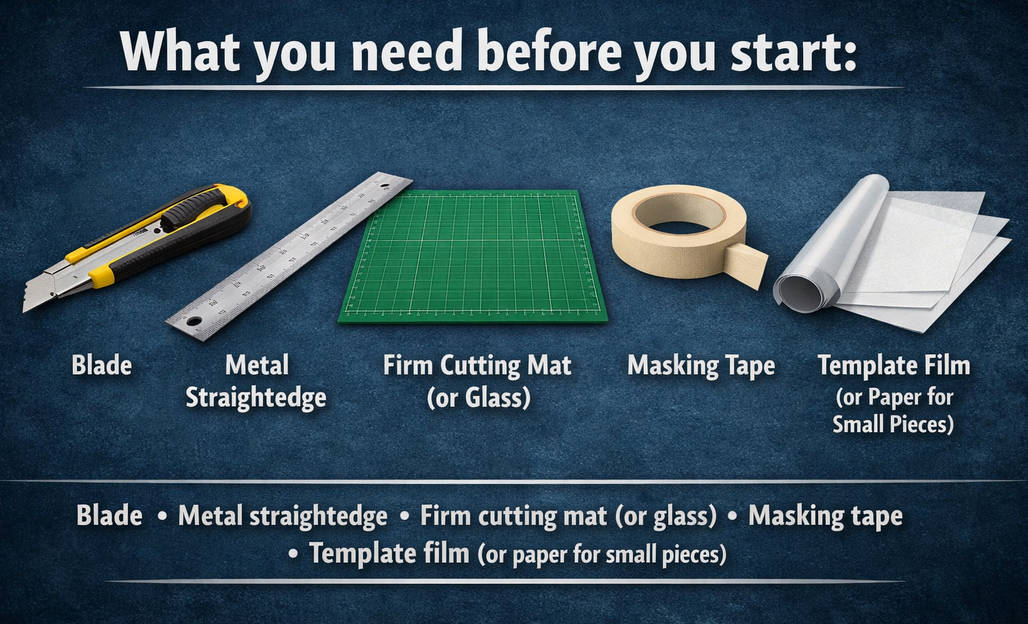
What you need before you start: Blade • Metal straightedge • Firm cutting mat (or glass) • Masking tape • Template film (or paper for small pieces) |
Before You Cut: Prep & Conditions
If you want to learn how to cut and install SeaDek the right way, start by cleaning the surface thoroughly. Wash with Dawn dish soap to remove grease, sunscreen residue, and general grime, then wipe everything down with 99% isopropyl alcohol. The surface must be completely clean and fully dry before you begin cutting or test-fitting any SeaDek pieces.
Temperature matters more than most people expect. SeaDek should be cut and installed in conditions between 50-100°F (10-38°C). Avoid stretching or compressing the foam while handling it, as it will rebound later and throw off your fit. When laying out multiple pads, plan for roughly a ¼-inch gap between pieces to allow for natural expansion once the material is installed.
Why rushing prep ruins cuts (and adhesion)If the surface isn’t fully clean and dry, SeaDek can shift slightly while you’re cutting it, even if you’re being careful. That movement makes edges wander, and gaps show up later. Leftover residue also affects how the adhesive sticks, which can cause corners to lift or seams to open after installation. Taking a bit more time to prep properly helps the pieces stay put and keeps your cuts looking clean. |
Tools & Materials
The most important tool for cutting SeaDek is a sharp blade. A 9 mm or 18 mm snap-off utility knife works best for most cuts, while an X-Acto knife can be useful for tighter areas and small adjustments.
Use brand-new blades and change them often - a blade that starts to drag will tear the foam instead of cutting it cleanly, which shows immediately along the edge.
A metal straightedge is crucial for keeping long cuts true, especially during a full SeaDek installation where small inaccuracies add up across multiple pads. For curves and rounded corners, simple radius guides work well; coins are often enough, though purpose-made radius templates give more consistency if you’re matching multiple pieces.
|
Pro tip: Always cut on a firm surface, such as a self-healing cutting mat or a piece of glass, to avoid flex that can throw off the blade path. |
Masking tape helps with layout, alignment marks, and holding templates in place while you work. After cutting SeaDek, a fine sanding sponge in the 400-600 grit range can be used lightly to tidy up any fuzzy spots along the edge. Keep this minimal - the goal is to clean the edge, not reshape it.
Blade Types vs. Use
|
Blade type |
Best used for |
Why it works |
|
18 mm snap-off utility blade |
Long straight cuts |
Wider blade stays stable against a straightedge and resists flex |
|
9 mm snap-off utility blade |
Short straight cuts and gentle curves |
Easier to control in tighter areas without sacrificing edge quality |
|
X-Acto / precision knife |
Inside cutouts and small adjustments |
Fine tip allows controlled entry and clean trimming around fixtures |
|
Utility blade angled by hand |
Light bevels |
Consistent angle creates a clean chamfer without removing too much material |
Template First: Nail Fit Before You Cut
Before you cut any SeaDek material, make a template. This step matters more than most people expect, and it’s where a lot of DIY SeaDek installs either succeed or quietly fall apart.
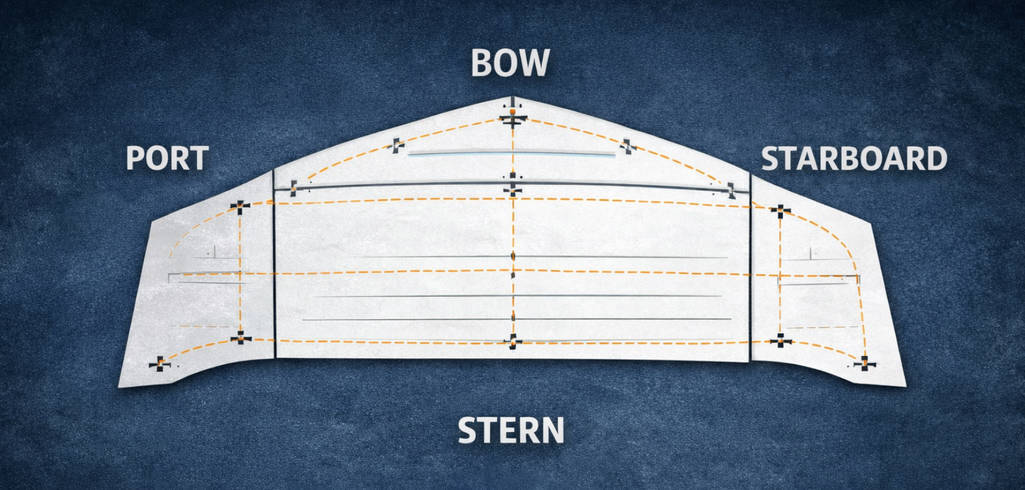
For larger areas or full SeaDek installation projects, a mylar template is the best option. It holds its shape, doesn’t stretch, and lets you transfer clean, accurate outlines onto the foam. For smaller pieces or simple shapes, a tape-and-trace method can work well enough, as long as you take your time and keep the tape lines tight and consistent.
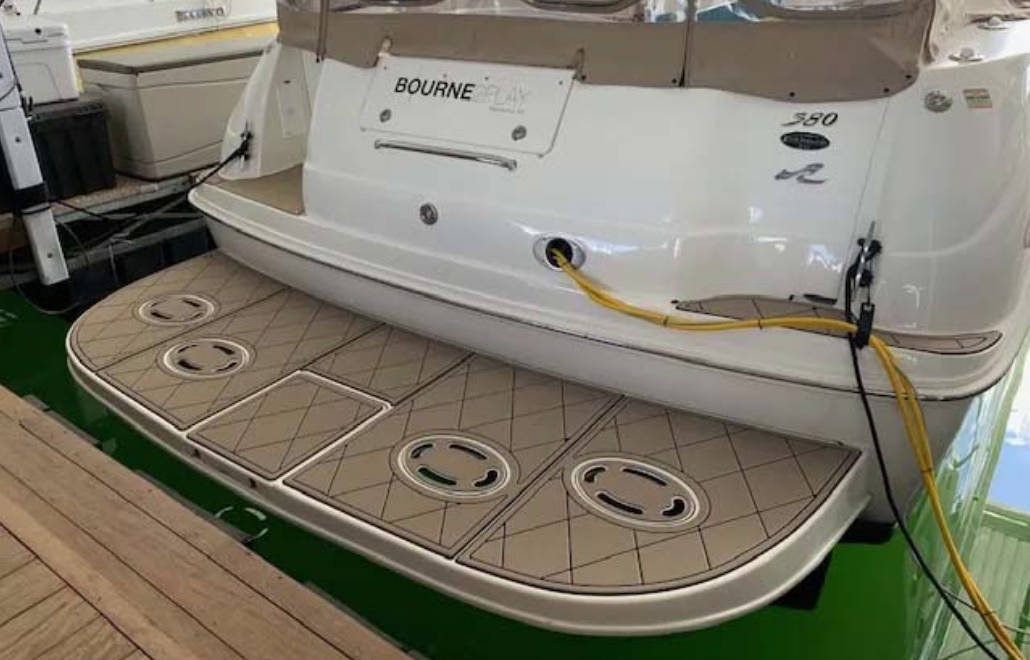
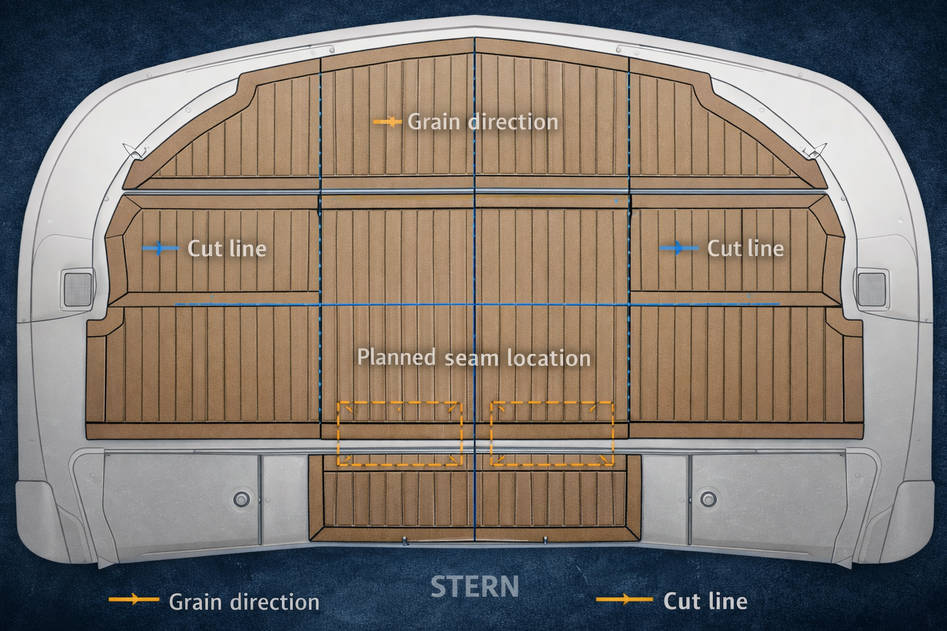
No matter which method you use, label everything clearly. Mark bow and stern, port and starboard, and note which edge faces outward. If your SeaDek has a faux-teak pattern or directional grain, draw alignment lines across adjoining sections so the lines stay continuous once installed. This is especially important when multiple pads sit next to each other.
Always dry-fit your paper or mylar templates on the boat before cutting the foam. Lay them in place, check gaps, and make small adjustments now. Fixing a paper template takes seconds; fixing a miscut SeaDek pad doesn’t happen.
Transfer & Layout: Grain, Symmetry, and Waste
When transferring your templates to the SeaDek material, pay close attention to grain direction and pattern flow. Faux-teak lines or embossed textures should line up across adjacent pads, otherwise even clean cuts can look mismatched once the SeaDek installation is finished.
Take a moment to lay pieces side by side and check that the pattern runs consistently before committing to any cuts.
Also, don’t assume factory edges are perfectly square. They often aren’t. If an edge will be used as a reference for alignment, trim it true first so your layout stays accurate as you work across the deck. Small errors here tend to multiply once multiple pads are involved.
Remember to plan your joins with intention. Seams are best placed in areas that aren’t immediately visible or under constant foot traffic. Thoughtful layout reduces wasted material and helps the finished deck look deliberate, rather than pieced together to make shapes fit.
Cutting Techniques
Straight Cuts (factory-clean finish)
For straight cuts, resist the urge to force the blade through in one go. Use a metal straightedge and make multiple light scoring passes, letting the knife do the work. This keeps the foam from tearing and gives you a cleaner edge once the cut is complete.
Keep the blade vertical as you cut. Tilting the knife even slightly will bevel the edge unintentionally, which becomes obvious when two pads meet. Just as important, keep the straightedge completely still. If it shifts mid-cut, you’ll see it immediately in the finished edge.
|
Pro Tip Change blades often. The moment the knife starts to drag, snag, or pull at the foam, snap off a fresh section. A sharp blade matters far more than speed when cutting SeaDek. |
Curves & Radii (no chatter, no nicks)
Curves need a slower approach. For both inside and outside radii, start with light, shallow scoring in short, controlled movements, then deepen the cut gradually. This prevents chatter marks and keeps the curve smooth.
Use coins or radius guides to keep curves consistent, especially if the same shape appears on multiple pads. Avoid cutting long arcs freehand - break the curve into small segments and connect them carefully. It takes a little longer, but the result looks intentional instead of improvised.
Inside Cutouts (scuppers, table pedestals)
Inside cutouts are where most DIY SeaDek installs get nervous, and for good reason. The key is to slow everything down. Start with a small pilot hole using just the tip of the blade - don’t stab deep or force it. Once you have an opening, expand it gradually using short, controlled passes.
Work against a small radius guide whenever possible to keep the cut clean and even. Coins work well for this. If you’re cutting around a fixed obstacle like a table pedestal or scupper, keep the SeaDek piece firmly in place while you cut.
Practical Boat Owner recommends weighting the material so it can’t shift mid-cut, and that advice holds up well in real-world SeaDek installation. A couple of sandbags or other soft weights can make a big difference here.
Bevels vs. Square Edges (when and how)
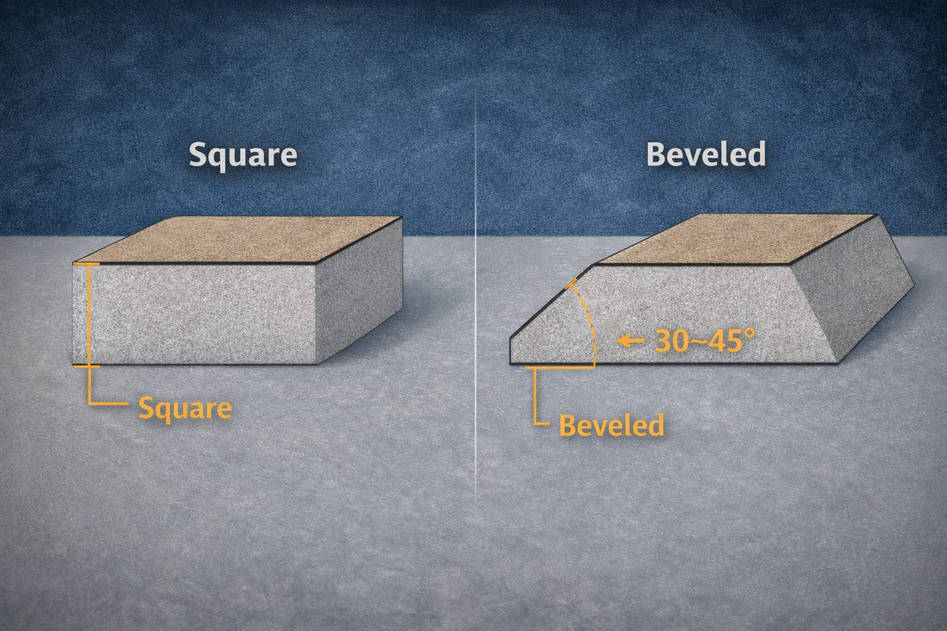
Square edges are the safest choice for most SeaDek installs. They maximize surface contact with the deck, hold up better over time, and hide small alignment errors more effectively. If durability and clean seams matter more than styling, stick with square cuts.
Bevels can look more refined when done well, but they reduce edge thickness and leave less material at the seam. If you choose to bevel, keep the angle shallow - roughly 30–45 degrees - and cut it by hand using a steady, consistent angle. Two or three light passes are better than trying to shape it all at once. If needed, lightly dress the edge with a 400-600 grit sanding sponge to clean it up, not to reshape it.
What Not to Do
Most cutting mistakes come from trying to save time or fix small errors on the fly. SeaDek doesn’t respond well to shortcuts, and a few common habits can undo otherwise careful work.
- Don’t use scissors. They compress the EVA foam instead of cutting it cleanly, which leaves ragged edges that never look right once installed.
- Don’t try to force a deep cut in a single pass. One-pass cuts tear the foam and make it harder to control the blade. Let the knife work gradually instead.
- Don’t cut on soft cardboard or uneven surfaces. The foam flexes underneath, which throws off the blade angle and leads to wavy edges.
- Don’t stretch the SeaDek to make it fit. It will relax back to its original shape after installation, opening gaps and throwing off alignment.
Dry-Fit Like a Pro
Before removing any backing, place every SeaDek piece on the deck and check the fit as a whole. Look at the gaps between pads and keep them consistent at roughly ¼ inch. Make sure alignment lines and patterns flow the way you planned, especially where multiple pieces meet.
Once everything is positioned correctly, mark baseline locations with a pencil or masking tape so you can put each piece back in the same spot during SeaDek installation. If something feels off, fix the template now. Adjusting paper or mylar takes minutes; fixing a misaligned pad after the backing is peeled usually isn’t possible.
Peel-and-Stick: Backing Removal the Right Way
Once you’re happy with the dry-fit, use SeaDek’s center-slice method to install each piece. Flip the pad over and carefully cut only the paper backing, starting at the center and working toward the edges. Don’t cut into the foam. Fold back the backing on each side to create small creases, about two inches wide, so the center section is exposed.
Reposition the pad on the deck using your alignment marks and tape one side in place to keep it from shifting. Press down the exposed center first, then slowly peel away the backing a few inches at a time while pressing outward from the middle. This helps prevent air from getting trapped underneath and keeps the pad aligned as it goes down.
Finally, use light, even pressure as you work. Don’t stretch the foam while applying it - SeaDek should be laid in place, not pulled into position. Let the adhesive do the work.
Edge Finishing & Cleanup
Once the pads are down, take a moment to check the edges before calling the job finished. If you spot any light fuzzing along a cut edge, gently dress it with a fine sanding sponge in the 400–600 grit range. Keep the pressure light - you’re just cleaning up the edge, not reshaping it.
Avoid using heat or flame to “clean” edges. While this sometimes comes up in DIY discussions about how to cut SeaDek by hand, it can scorch the surface or change the foam’s texture and color, and it isn’t part of recommended SeaDek installation practices.
After finishing the edges, wipe away any dust or debris with a clean, damp cloth. For routine cleaning after installation, stick to SeaDek’s recommended cleaners and avoid harsh chemicals that can damage the surface or affect the adhesive over time.
Troubleshooting (Quick Fixes)
Even with careful prep, small issues can show up when learning how to cut SeaDek material and install it for the first time. Most of them are easy to fix if you catch them early and resist the urge to force anything.
- Slight overcut: Close the gap slightly during installation to disguise it.
- Minor edge fuzz: Lightly clean up the edge with a fine sanding sponge.
- Misalignment noticed mid-peel: Stop where you are and don’t pull up any area that’s already stuck down. Reposition the remaining sections using short, controlled peels - this is where a careful dry-fit pays off.
- Air pockets: Press from the center outward using a clean cloth. Avoid hard rollers, which can stretch the foam and create new alignment issues.
Advanced: Matching Faux-Teak Lines Across Panels
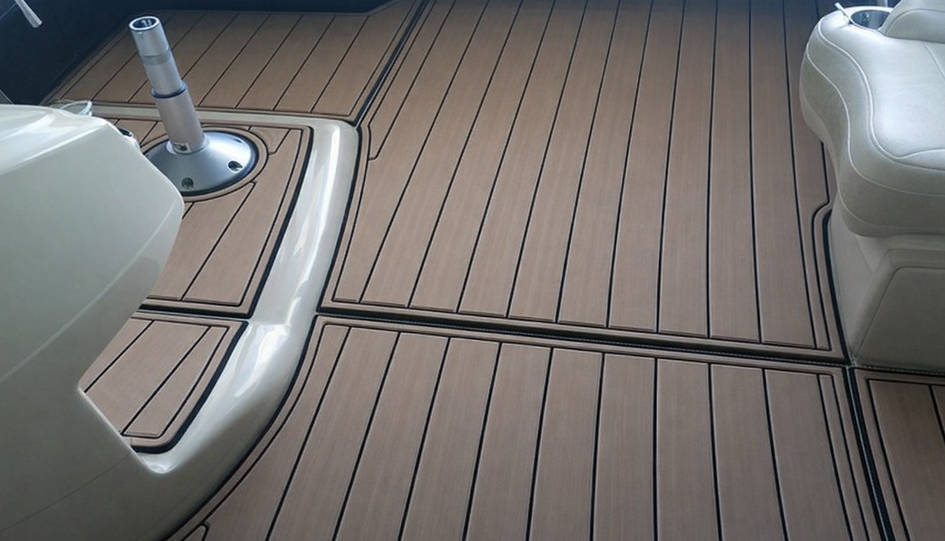
When working with faux-teak SeaDek, matching the lines across multiple panels is what separates a clean install from one that looks pieced together.
The best way to cut SeaDek is to draw registration lines across adjacent templates before you cut anything. These lines give you a clear reference so the pattern stays continuous once the pads are installed.
Transfer those registration lines onto the backing of the SeaDek material during layout. When it’s time to install, start from the center and work outward so the lines meet naturally at the seams. This method reduces drift and keeps the pattern aligned as the adhesive sets.
A Better Deck Starts With the Details
A clean SeaDek install is less about confidence and more about restraint. Taking the slower route, checking fit as you go, and treating each cut as final leads to a result that feels deliberate once the boat is back in the water.
If something doesn’t sit right during the process, it’s usually worth stopping and correcting it before moving on. Care at this stage pays off every time you step aboard, long after the tools are packed away.
Get a custom SeaDek kit and see how proper traction and comfort change the way your boat feels on the water.
FAQs
What’s the best way to cut SeaDek by hand?
Use a sharp snap-off utility knife, a metal straightedge, and a firm cutting surface. Make multiple light passes instead of forcing a deep cut. This gives you better control and cleaner edges, especially on longer runs.
Can I bevel SeaDek edges?
Yes, bevels can be cut by hand using a utility knife held at a steady angle. They can look more refined in some areas, but square edges hold up better and hide small alignment issues. Bevel only when the look makes sense for the space.
Should I router EVA foam?
Routing works well in CNC or production environments where consistency matters across many pieces. For DIY SeaDek installation, it isn’t necessary and often introduces more risk than benefit. Hand cutting offers more control for one-off installs.
What should I clean with before installing SeaDek?
Start with Dawn dish soap to remove grease and residue, then wipe the surface with 99% isopropyl alcohol. Let everything dry fully before installation. Ideal conditions are between 50–100°F (10–38°C). Afterwards, you can clean your SeaDek with SC Wake Boat Juice.