
Quick Fixes for Common SeaDek Issues
posted by Erica Fisk on Aug 25th 2026
The physical stresses of boat ownership can eventually become glaringly apparent, even with a product as high-quality as SeaDek. For a host of different reasons, you may now find that it doesn't look quite as pristine as it did the day it went down.
It's fine, though. Most SeaDek appearance issues are cosmetic, fixable, and something we see constantly.
We have lost count of the number of photos we have received from worried boat owners who thought their decks were ruined after a mishap of some description. Nine times out of ten, it really wasn't. Most SeaDek issues can be sorted with patience and the right approach, and this short blog post will show you how.
Before we get to that, we should quickly explain why something as durable as SeaDek would ever begin to show a few bruises and scrapes. The answer, as with most things in life, relates to good old Father Time.
How SeaDek Wears Over Time
SeaDek lives outdoors on a moving platform in direct sunlight, surrounded by water, which is a punishing existence for any material.
Given enough time, UV exposure breaks down the foam's surface, and heat cycling (those relentless swings from blazing afternoon sun to cool evening air) stresses the adhesive bond. Water intrusion around edges accelerates the process, particularly if the original installation left any gaps.
High-traffic zones such as the helm area, swim platform, and main walkways take the brunt of compression wear. Then there are the self-inflicted wounds, such as harsh cleaning chemicals, pressure washers held too close, or heavy gear dragged across seams.

Issue-by-Issue Quick Fixes
These are the five problems we get asked about most. Not all of them will apply to your boat, and not all of them will require SeaDek repair, but it pays to know what you're looking at before you reach for the toolbox.
-
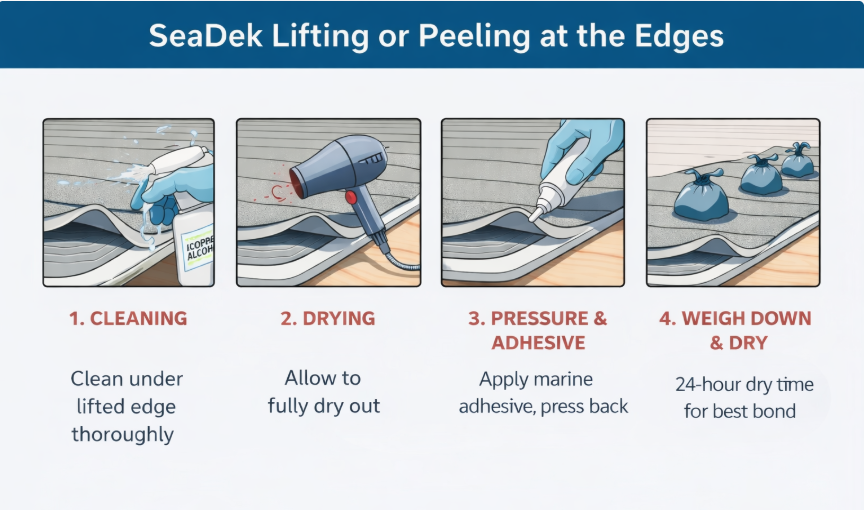
SeaDek Lifting or Peeling at the Edges
What it looks like: Edges curling up, corners pulling away from the deck surface, or small sections that have lost adhesion entirely.
Why it happens: Heat softens the adhesive, moisture creeps underneath, and foot traffic works corners loose over time. Boats that live uncovered in direct sun see this more than anything.
How to reglue SeaDek that's lifting: Clean under the lifted section with isopropyl alcohol, removing every trace of salt and grime from both surfaces. Let it dry completely, then apply a marine-grade acrylic adhesive, press firmly, and apply weights to the area for at least 24 hours.
⚠️What NOT to do: Avoid silicone-based adhesives or household super glues. These either won't bond properly to EVA foam or will create a mess that makes future SeaDek repairs much harder.
When it won't work: If the pad has completely detached from a large area, or the foam is degraded and crumbly, re-gluing the edges won't solve the problem.
-
SeaDek Stains and Discoloration
What it looks like: Yellowed patches, dark spots, or blotchy discoloration that doesn't respond to normal cleaning.
Why it happens: Sunscreen is the single most aggressive stain source, followed by fuel residue, fish blood, and certain food spills. Some sit on the surface; others absorb into the foam's texture and set up camp.
How to get stains out of SeaDek: Start gently and escalate if needed. Soap and hot water with a stiff brush will handle most surface grime. For stubborn marks, SC Wake's SeaDek Boat Juice is formulated specifically for flooring.
For serious staining, a diluted Magic Eraser approach can work, just don't go at it too hard, because you will probably scrub the texture off along with the stain.
Stain Type vs. Cleaning Approach
|
Stain Type |
Cleaning Approach |
Success Likelihood |
|
Sunscreen |
Boat Juice or mild degreaser, stiff brush |
High if caught early; moderate once absorbed |
|
Fish blood |
Hot soapy water immediately; Boat Juice for dried stains |
High with prompt attention |
|
Fuel/oil residue |
Mild degreaser, rinse thoroughly |
Moderate; may leave a shadow on lighter colors |
|
Bird droppings |
Soak with hot water, scrub with a stiff brush |
High if not left to bake in the sun |
|
Rust stains |
Specialist marine rust remover (check compatibility) |
Low to moderate; often permanent on light foam |
⚠️What NOT to do: Bleach, acetone on the foam surface, or abrasive pads will strip color and texture faster than they'll remove the stain. You will trade one problem for a worse one.
When it won't work: Deep, absorbed discoloration from fuel stabilizers or rust may be permanent. If the stain has been baking in the sun for weeks, you are basically managing appearance rather than restoring it.
-
Flattened or Compressed Foam Areas
What it looks like: Sections of foam that are visibly thinner or flatter than surrounding areas, typically at the helm, along main walkways, or anywhere heavy gear sits.
Why it happens: EVA foam compresses under sustained pressure. High-traffic zones get worked over relentlessly, and the foam doesn't fully spring back the way it did when new. If it makes you feel any better, the helm area on virtually every boat we see looks exactly like yours.
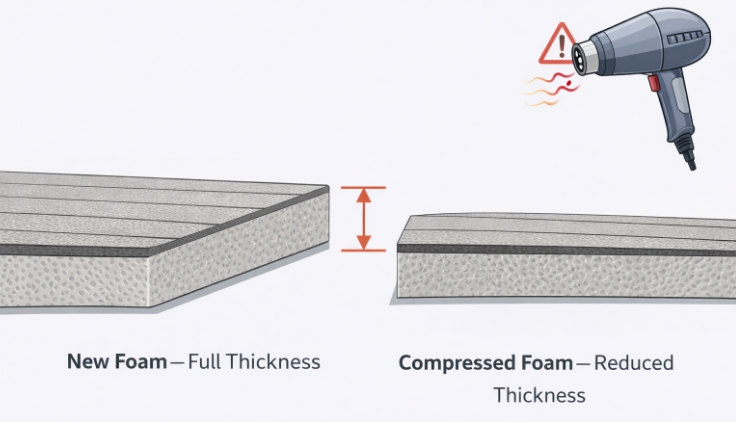
Quick fixes: Gentle heat application can coax some recovery. A heat gun on its lowest setting, held at a safe distance, allows the cell structure to relax slightly. Don't expect miracles, though - remember, you are getting visual improvement, not structural restoration. Foam compressed for seasons won't return to factory thickness.
⚠️What NOT to do: High heat will melt or warp the foam, and there's no reversing that. Keep temperatures moderate and your distance generous.
-
SeaDek Losing Grip (Slippery When Wet)
What it looks like: The deck feels slick underfoot when wet, despite the textured surface.
Why it happens: Nine times out of ten, this is a contamination issue, not the material wearing out. Cleaning residue, sunscreen film, or accumulated grime fills the texture grooves that provide traction. Less commonly, the texture has genuinely worn smooth.
We once had a customer who had been relentlessly waxing his SeaDek with boat hull wax for two full seasons, wondering why it was so slippery. Don't make the same mistake!
Fix steps: Hot water, a stiff brush, and a SeaDek-safe cleaner. Work the brush into the texture pattern to clear the grooves. For areas where the texture has genuinely worn, very light abrasion with a fine Scotch-Brite pad can restore some grip, but this is a careful operation, not an aggressive scrub.
|
⚠️Important safety note: Never use harsh abrasives, wire brushes, or coarse sandpaper. You will destroy the surface texture and create a pad that's genuinely unsafe when wet. If cleaning doesn't resolve severe traction loss, that section likely needs to be replaced. |
-
Small Cuts, Tears, or Gouges
What it looks like: Nicks, small tears, or gouges in the foam surface from hooks, cleats, dropped tools, or dragged equipment.
Why it happens: EVA foam is durable, but it's still foam. Sharp objects and concentrated pressure will damage it—particularly if your dog decides the swim platform is a scratching post (pet damage isn't covered under warranty, incidentally).
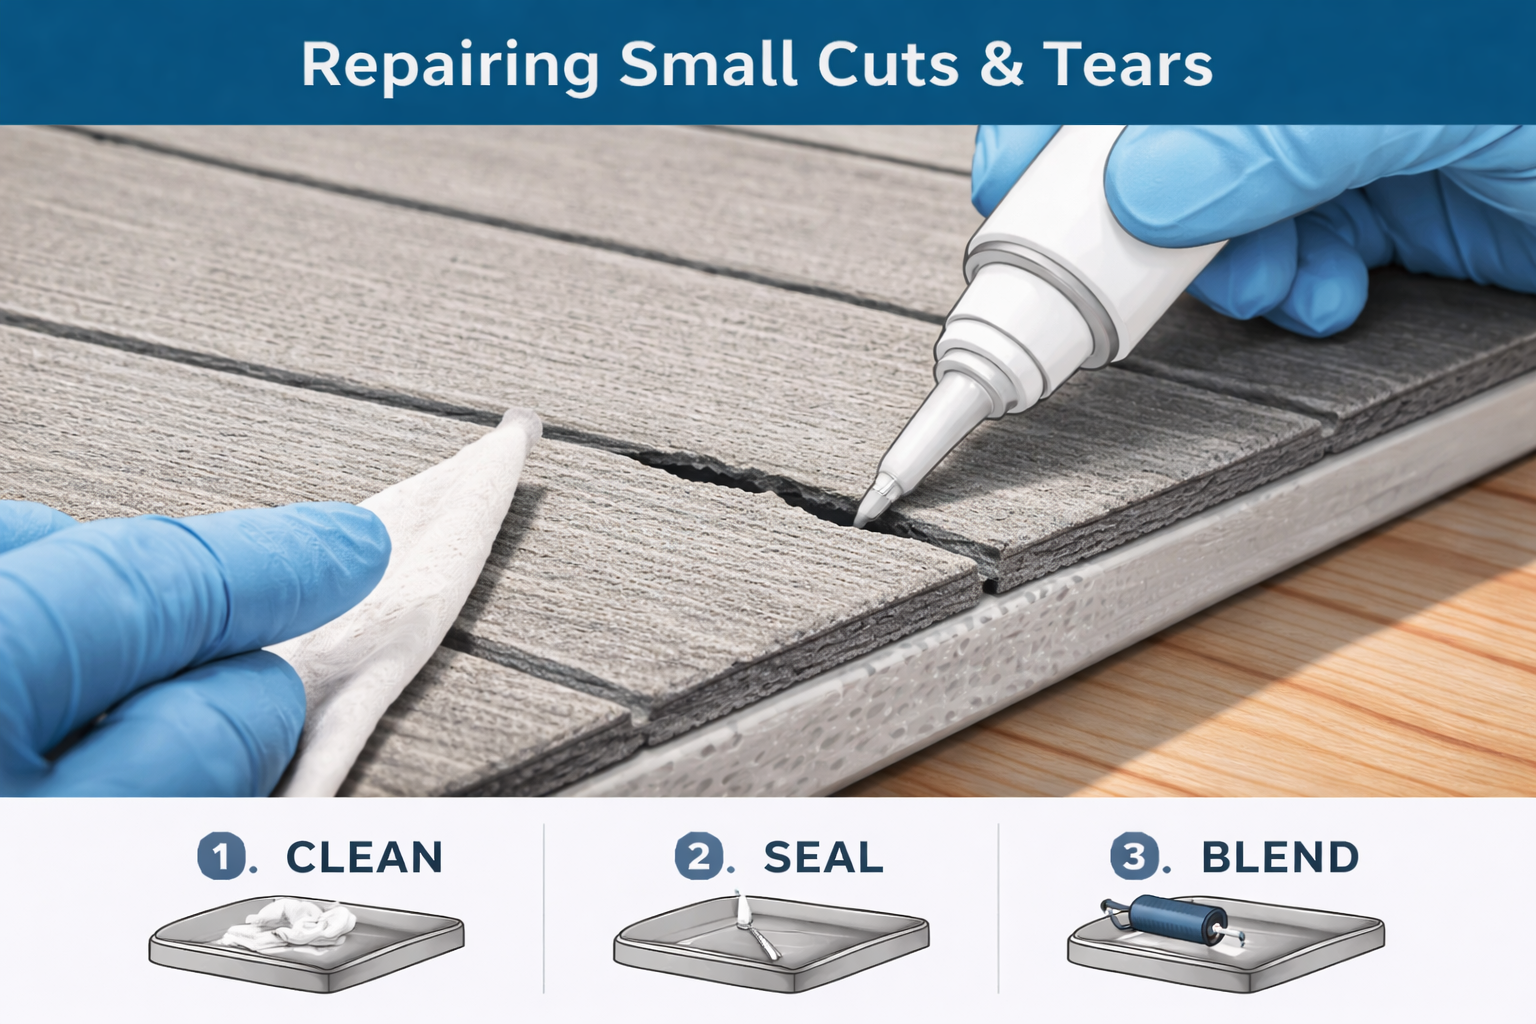
Quick fixes: Seal the edges to prevent spreading. A thin line of marine-grade acrylic adhesive along the tear bonds the foam and stops water intrusion. Color-matched repair kits can help blend minor damage. It won't be invisible, but it'll stop bothering you every time you look at it.
⚠️When it won't work: Deep gouges through the full foam thickness, or tears near edges where water can get underneath, may need professional attention.
Cleaning and Maintenance Mistakes That Cause Most Problems
The fact is that a solid proportion of SeaDek damage is owner-inflicted. Not through malice, but through well-intentioned cleaning habits that can eventually wreck things.
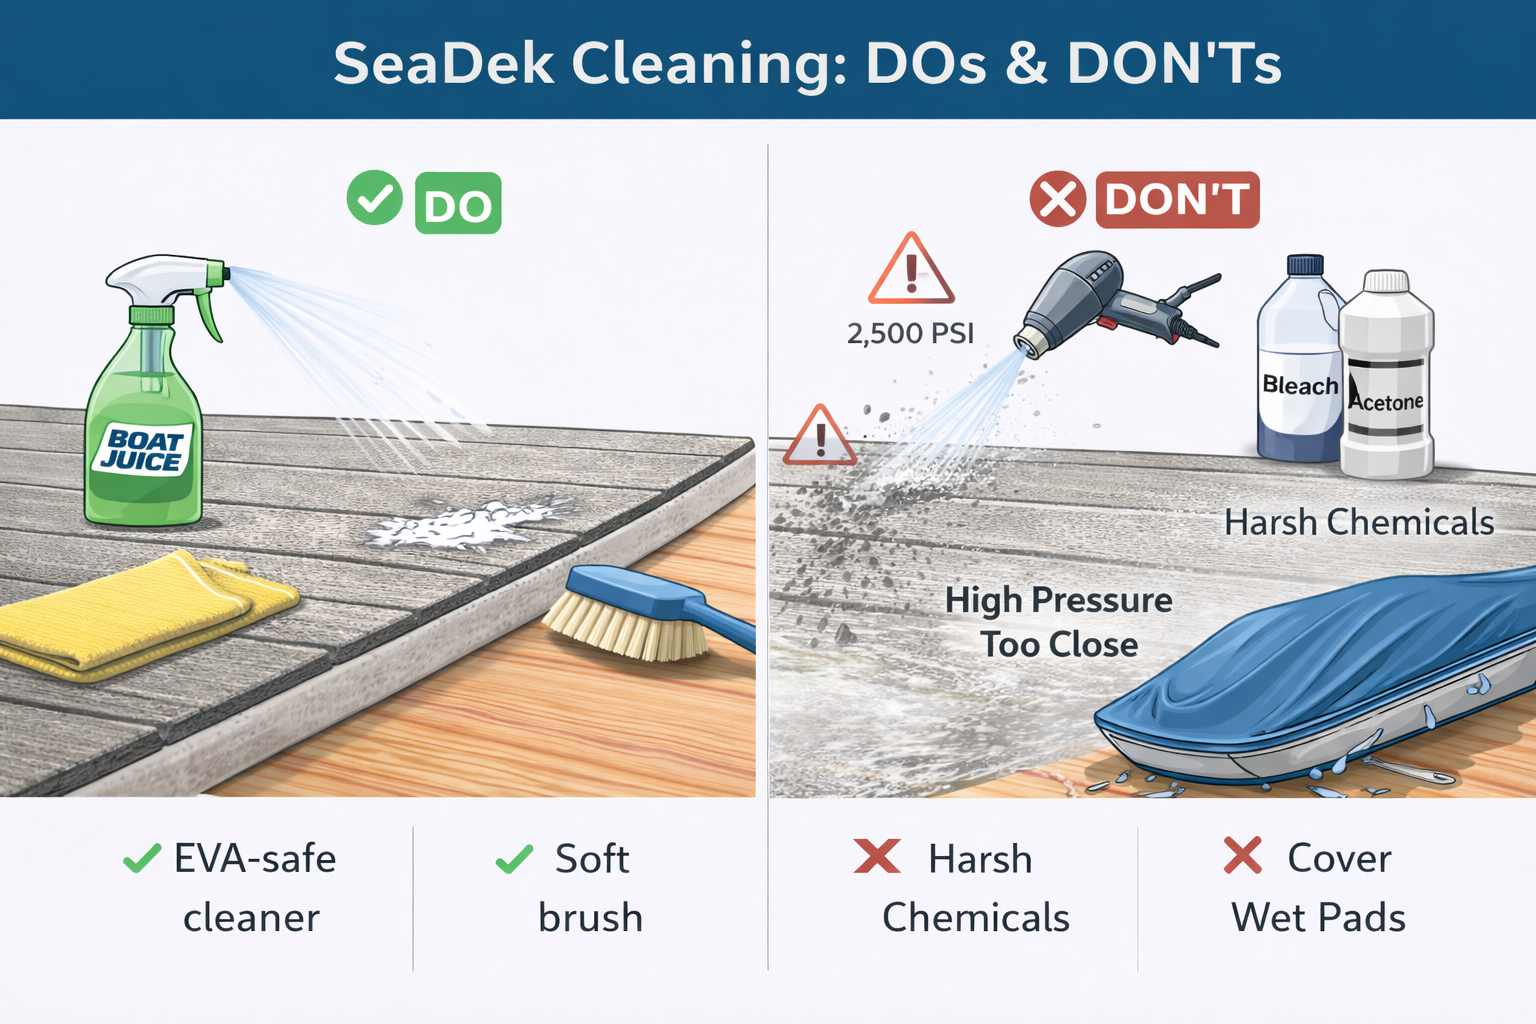
Pressure washers are the most common offender. Held too close, they blast the texture right off the foam and can lift edges by forcing water underneath the adhesive. If you must use one, keep it at a generous distance and use a wide fan tip, never a pinpoint nozzle.
The number of decks we've seen wrecked by someone going at them with a 2,500 PSI nozzle from six inches away is genuinely quite depressing!
Harsh chemical cleaners are a common issue. Bleach, acetone, and industrial degreasers strip colour, degrade the foam, and leave things looking worse than the stain you were trying to remove. Stick to EVA-safe products like SC Wake's Boat Juice, which is formulated specifically for this job.
Leaving pads wet under a boat cover creates a humid microclimate perfect for mildew and adhesive breakdown. Let the deck dry before covering. And dragging heavy gear across seams catches edges and starts the lifting process that eventually requires SeaDek repair.
When Quick Fixes Aren't Enough
Now, there is a point where persistence stops being prudent and starts costing you money. There's a clear line between an edge that needs re-gluing and a pad that's fundamentally failed, and crossing it with DIY enthusiasm usually makes the eventual professional SeaDek installation job harder.
Adhesive failure across a large surface area (where the pad lifts in the middle, not just at corners) means the bond has broken down beyond what spot-regluing can fix. Severe UV degradation, where the foam has gone chalky or brittle, means the material is done. Foam that's crumbling or losing its cell structure needs to be replaced, not repaired.
How to Extend SeaDek Life After Repairs
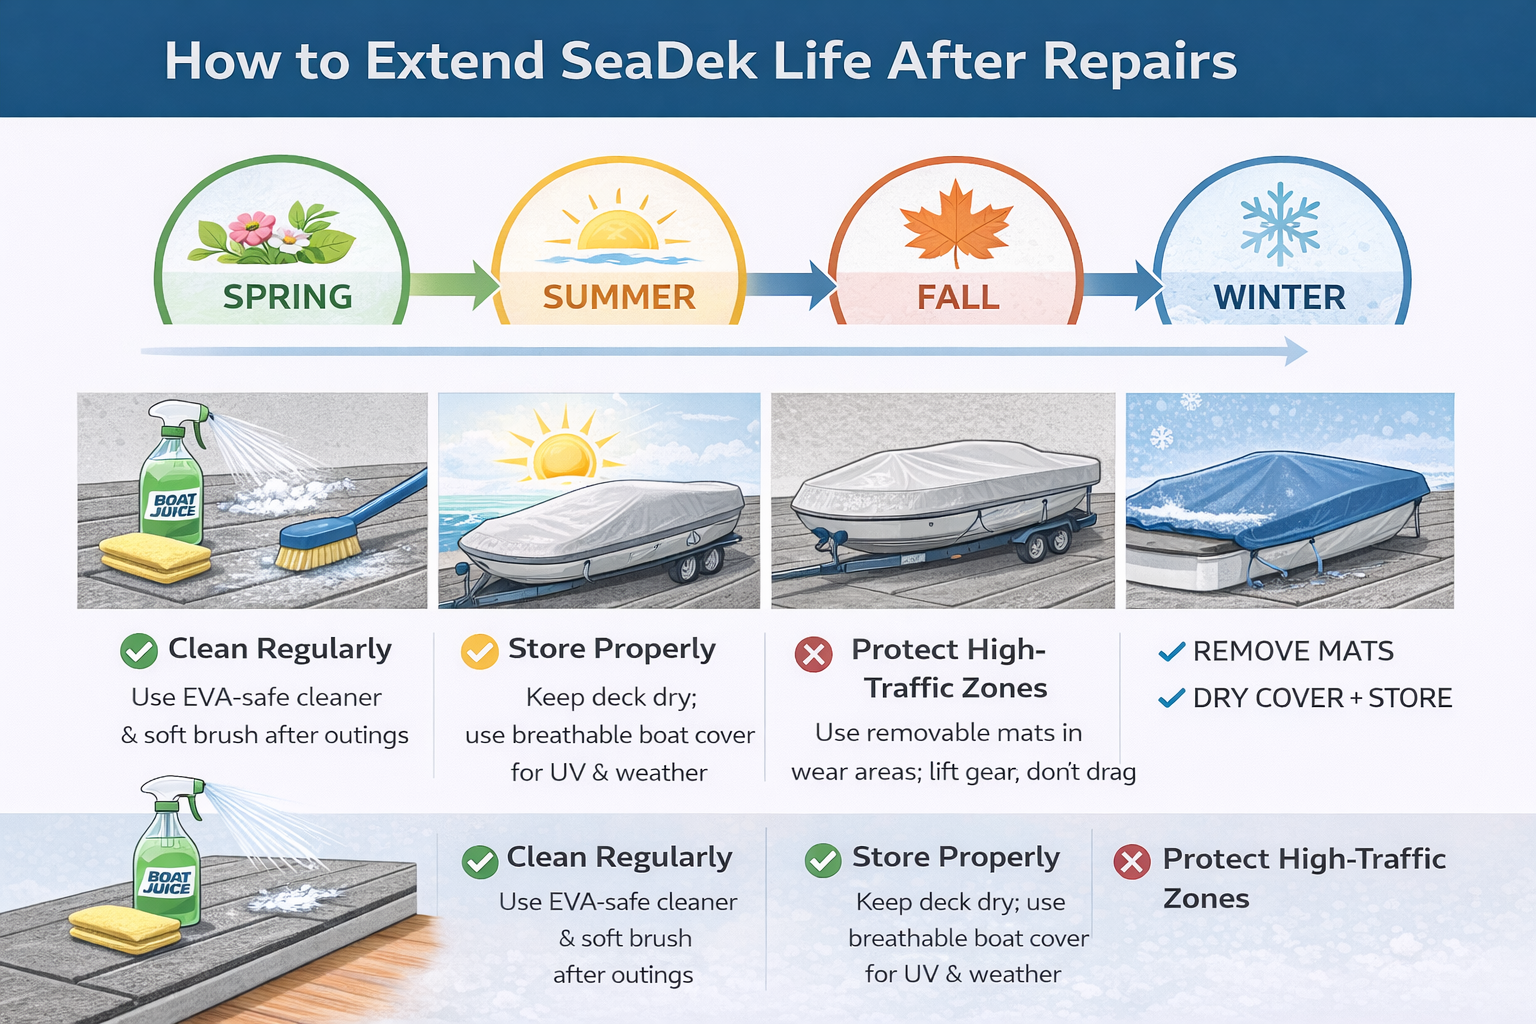
Once you have sorted out whatever issue brought you here, a few habits will keep things looking good significantly longer.
Clean Regularly
Soap, hot water, and a stiff brush after every few outings keep grime from building up. Deal with spills promptly; sunscreen, fuel, and fish blood cause far less damage when caught quickly than when left to bake in the sun.
Storage
Indoor or covered storage extends SeaDek's lifespan well beyond the standard five-to-seven-year window. If that's not an option, a breathable boat cover protects the foam from UV while allowing moisture to escape. Ensure the deck is dry before covering.
High-Traffic Zones
Consider removable mats where the heaviest punishment lands. Lift gear rather than dragging it, and keep heavy items off seams. These small habits prevent the mechanical damage that turns minor issues into replacement conversations. Honestly, most of this is just common sense that becomes obvious about a week after you've done the wrong thing.
Bottom Line
Most SeaDek issues fall firmly into the annoying-but-manageable category. Edge lifting, surface stains, minor compression, and traction loss are all perfectly normal consequences of using your boat. The secret to long-lasting boat flooring is straightforward fixes caught early.
Either way, the pattern is always the same: gentle cleaning first, targeted repair second, replacement only when the material has given up. Regular cleaning, proper storage, and sensible gear handling do more than any repair technique ever will.
FAQs
Can I do a SeaDek repair myself, or should I call a professional?
Minor fixes such as edge lifting, surface stains, and small cosmetic tears are well within DIY territory. Where it gets tricky is large-scale adhesive failure or foam that's structurally degraded. If the problem spans more than a small area or your first fix didn't hold, save yourself the headache and get a professional opinion.
How to reglue SeaDek that keeps peeling up at the corners?
Clean both surfaces with isopropyl alcohol, let them dry completely, and apply an acrylic-based adhesive. Press firmly and weight the area for 24 hours. The key is making sure everything is bone dry before you stick it back down - moisture under the pad is usually the reason it lifted in the first place.
How to get stains out of SeaDek without damaging the surface?
Start with soap, hot water, and a stiff brush. If that doesn't shift it, try SC Wake's Boat Juice. For really stubborn marks, a Magic Eraser used lightly can help, but don't go overboard - scrubbing too hard will take the texture off with the stain.
How often should I clean my SeaDek?
After every few outings is a good rule of thumb. The longer grime, sunscreen, and salt sit on the surface, the harder they are to remove and the more damage they do. A quick scrub at the dock takes five minutes and saves you a much bigger job later.
Will my SeaDek ever look brand new again after repairs?
Probably not. You can get it looking significantly better, and most fixes will stop problems from getting worse, but expecting factory-fresh results from a pad that's been in the sun for three seasons isn't realistic. That said, a well-maintained SeaDek that's had a few repairs still looks a world better than one that's been ignored.